


While offering basic recording functions, FonePaw Screen Recorder also provides you with some personalized settings. You can adjust the corresponding settings according to your own usage habits and needs. Just read on to explore the customized settings.
Recording Settings
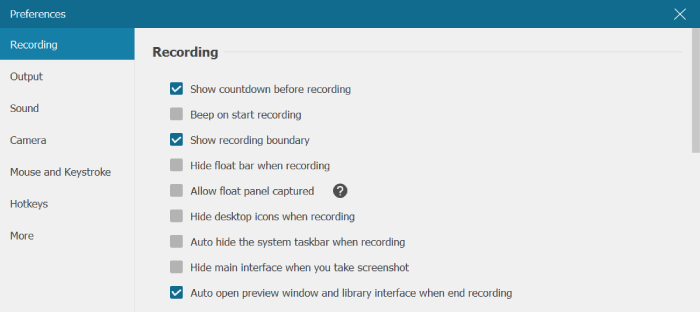
Recording Settings can help you adjust the content of the recorded screen, excluding the interference of some system status icons and taskbar to ensure a clean recorded screen. Of course, you can also bring up the system taskbar and float panel when you record some demo videos.
More detailed settings are shown in the following picture.
Output Settings
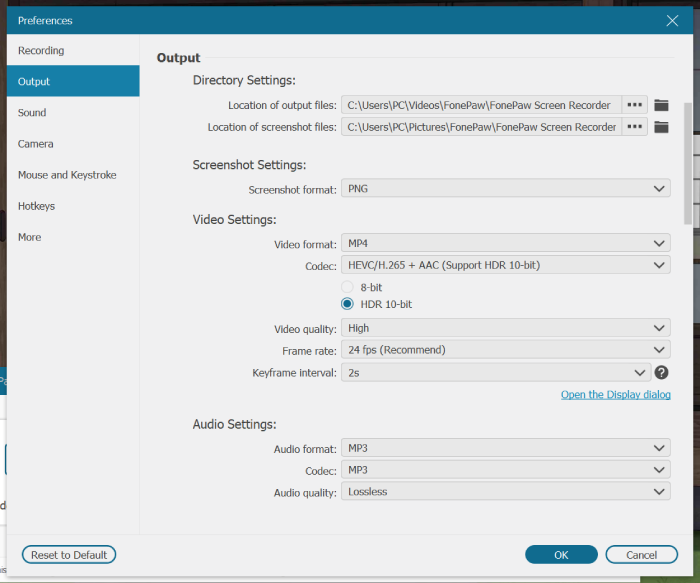
You can adjust the audio and video parameters of the recordings in Output Settings to meet your special needs, such as the pursuit of a better playback experience, compatibility with various software, etc.
See more detailed settings in the following charts.
| Video Settings | Available Options |
| Video Format | MP4, MOV, WMV, F4V, MPEG-TS, WebM, GIF |
| Codec | H.264 + AAC(8-bit only), HEVC/H.265 + AAC(Supports HDR 10-bit) |
| Video Quality | Lowest, Low, Middle, High, Highest, Lossless |
| Frame Rate | 5fps, 10fps, 20fps, 24fps, 25fps, 30fps, 60fps |
| Keyframe Interval | 1~10 seconds |
Notice thet videos with longer keyframe interval can be compressed into smaller files. The keyframe also affects the accuracy of positioning during playback and cutting.
| Audio Settings | Available Options |
| Format | M4A, OPUS, MP3, WMA, AAC, FLAC(Lossless), WAV(Lossless) |
| Codec | MP3 |
| Quality | Lowest, Low, Middle, High, Highest, Lossless |
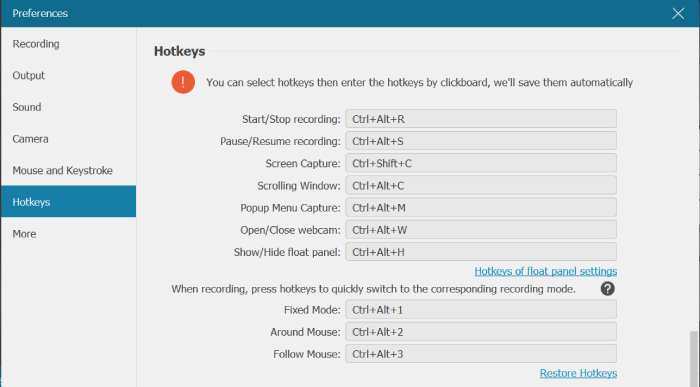
Hotkeys
FonePaw has a lot of preset hotkeys to help you do some simple operations during recording. You can also edit them in Preferences to set your own hotkeys for the corresponding operations.

Need More Help?
Questions not answered yet? Contact our support team and we’re standing by.