


Recording screen and audio on Windows 10 is rather easy thanks to its built-in screen recorders and Xbox Game Bar. This post will show you how to use the Xbox Game Bar to screen record on Windows 10 if you don't know. However, this tool can only help you with the most basic recording for just one application. It's hard to meet your requirements if you consider recording multiple windows simultaneously.
Therefore, we will show you other professional ways to use several multi-functional screen recorders to record your screen on Windows 10 with audio, in which you can do the screen recording with more features such as adding annotations, recording all desktop activities, capturing full audio and webcam, and more.
Comparison of 4 Screen Recorders for Windows 10
Before scrolling down, you can take a look at the comparison table of these four screen recorders to select your favorite one. Then, see how to record screen and voice on Windows 10 in this post.
| Record Internal and External Sound | Record Webcam | Schedule Recording | Intuitive UI | Add Real-time Annotations | Edit Recordings | |
| FonePaw Screen Recorder | ✅ | ✅ | ✅ | ✅ | ✅ | ✅ |
| Xbox Game Bar | ✅ | ❌ | ❌ | ✅ | ❌ | ✅ |
| UkeySoft Screen Recorder | ✅ | ✅ | ✅ | ❌ | ✅ | ✅ |
| VLC | ✅ | ✅ | ❌ | ❌ | ❌ | ❌ |
How to Screen Record on Windows 10 with Audio via FonePaw 🔥
💡 FonePaw Screen Recorder can record:
● Screen
● Applications
● System sound
● Microphone
● Webcam
● Gameplay
It's highly recommended to use FonePaw Screen Recorder, an all-around screen recorder that can record screens on Windows 10 with system sound and microphone. With FonePaw, you can record not only the screen but also all desktop activities including webcam, gameplay, etc. with various recording modes. The H.265 codec is also supported to ensure the best video quality with a smaller file size.
Free Download Buy with 20% off
⭐ Main Features of Windows 10 screen recorder FonePaw:
- Record Video, Audio & Webcam – Record screen with internal and external audio. Meanwhile, you can record screen and webcam together, which the built-in screen recorder cannot do.
- Various Output Formats & GIF Maker – The recording can be of format WMP4, MOV, AVI, F4V, TS and even GIF, which means you can directly make GIF via this software.
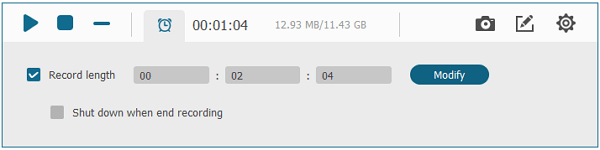
- Schedule recording to record videos automatically – You can set a task schedule with start time and recording length and repetition to make the software record screen automatically.
- Custom & Preference Settings – You can customize your recorded video flexibly. For example, you can select any recording areas or windows on your computer.
- High Quality & No Restriction – It can record your screen in original quality and no lag (frame rates up to 60 fps).
- Add Annotations & Personalize Watermark – Record screen on Windows 10 without watermark by default. And you can add real-time annotations during the screen recording.
📽Video Guide: Screen Record on Windows 10 with Audio
📌 Record Screen on Windows 10 with FonePaw Screen Recorder
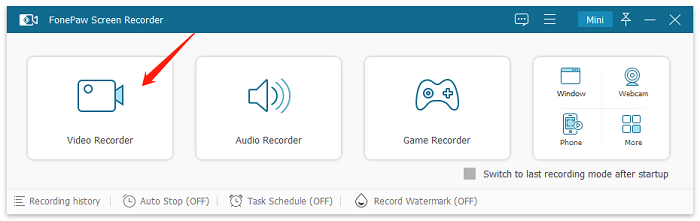
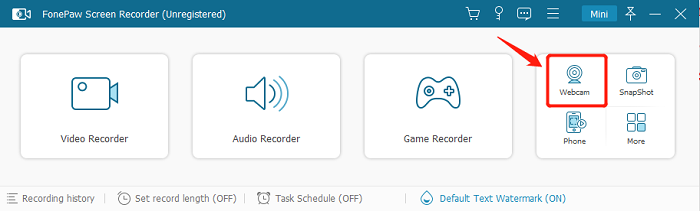
STEP 1. Launch FonePaw Screen Recorder and Go to Video Recorder
After you get this tool running, you will see multiple gadgets on the homepage. Click "Video Recorder" to record screen on Windows 10 wiwh audio.
 Note:
Note:
- The Game Recorder is specially developed for recording games on PC. Recording your gameplay with the Game Recorder instead of a Video Recorder allows you to get a game recording without lag.
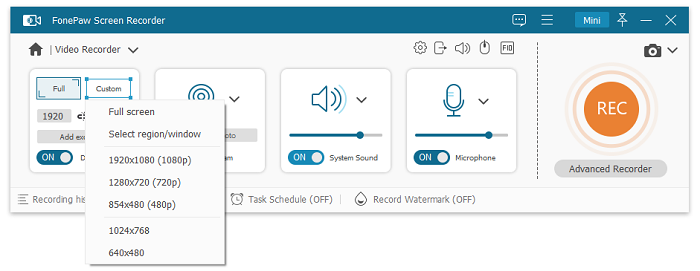
STEP 2. Set up for the Screen Recording on Windows 10
Select the Windows 10 screen recording area and enable the system sound or the microphone sound depending on your actual needs. If you want to record your webcam activities, don't forget to turn on the webcam. For other settings, you can adjust them in the Preferences panel.
STEP 3. Start Recording screen on Windows 10
After finishing the setup, click "Rec" button and start to screen record. There are some bonus actions you can take on the floating bar during the recording:
- Pause the recording
- Take a Screenshot
- Set a Timer
- Draw on the captured screen during the recording
- Turn on/off the Webcam
- Adjust the volume of the system or microphone
- Remove windows that you don't want to record
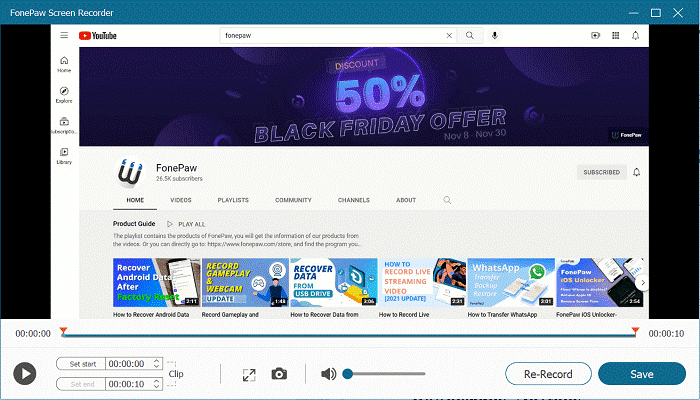
STEP 4. Cut and Save the Recording
When you are done recording, click "Stop". A window of recording previewing will pop up. You can preview it to see if the recording is perfect or trim your recording here with a paid version. After everything is done, tap "Save".
As a beloved screen recording software, FonePaw Screen Recorder offers you professional features and beats others with its compatibility and functionality. With this screen recorder, you can record screen on Windows 10 without Xbox.
Free Download Buy with 20% off
How to Screen Record on Windows 10 with Built-in Screen Recorder [Official]
💡 Xbox Game Bar can record:
● A running application
● (Multiple applications at a time and the desktop screen are not available)
● System sound
● Microphone
It's doubtless that Xbox Game Bar is the most convenient Windows 10 screen recording solution. You can record an application on Windows 10 without downloading any software. And the way to use this Windows 10 free screen recorder is also simple.
Therefore, it becomes understandable that this tool is limited. It lacks features that many people commonly need, like recording the entire desktop rather than one running window, customizing the recorded area and sound volume, adding annotations, etc. If you have such needs, you can look for a screen recorder to record the screen on Windows 10.
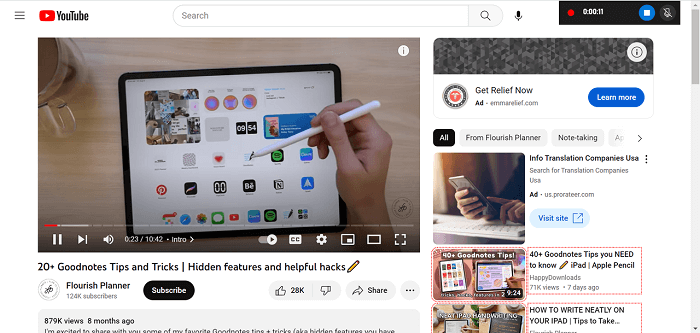
STEP 1. Get your game window ready and press "Win+G" on the keyboard, and you will see the floating widget of Xbox Game Bar.

STEP 2. Select the "Capture" feature for a video recording. Unmute the microphone on the pane if you need to record screen with voice on WIndows 10. Then, no extra settings needed, just use the shortcut "Win+Alt+R" to start recording (or you can hit the Start button).
STEP 3. You can see the capture status while you are recording the program. Press "Win+Alt+R" again to finish the recording, or you can also hit the Stop button. Then, click Win+G to confirm the recording. The video or game clip will be automatically saved to the default folder.
If you have tried the Xbox Game Bar and found that this Windows 10 screen recorder is not for you, you might wonder how to record screen on Windows 10 without Xbox Game Bar. Don't worry. As mentioned above, FonePaw Screen Recorder is a multi-functional alternative that can meet all kinds of screen and audio recording requirements for you.
Apart from that, there are also 2 powerful screen recorders for Windows 10: UkeySoft Screen Recorder and VLC Media Player. You can read on to learn about them.
How to Screen Record on Windows 10 with Audio via UkeySoft
💡 UkeySoft Screen Recorder can record:
● Screen
● Both system sound & microphone
● Webcam
● Streaming videos
UkeySoft Screen Recorder for Windows is another special pick for recording your computer with sound (external & internal). It wins high rate from lots of users and media with its high quality, multifunctional features, and cost-effectiveness. This easy-to-use yet comprehensive recording tool can not only record the computer, screen, but also the audio, and webcam.
You can use it to record screen and audio on Windows 10, 11, 8.1, 8, 7, XP & Vista PC without lag. In addition, if you use the Mac computer, you can use it's Mac version to record audio only on Mac.
It also offers other attractive advanced features, such as transitions, video editing or conversion, various output formats and 4K recording, etc. After recording, you can add effects, watermark, music and more, which is very useful and convenient for tutorial video production.
Outstanding Features of UkeySoft Screen Recorder for Windows:
All-in-one Recorder - It supports to record the entire screen, capture custom area and webcam on your computer. Also, it lets you record videos, online meeting, tutorials, gameplay, and any desktop activity.
Audio Recorder - You can record system sound or microphone separately, or simultaneously. UkeySoft Screen Recorder for Mac even allows you to record audio from streaming music platforms, videos with high quality.
Take Screenshots - It is also a handy screencast video software that allows to make screenshots of your entire/custom screen in real time.
4K Recording - Besides HD recording, it even offers up to 4K/60fps captures without zero quality loss. You can use it to record 4K video on your computer with ease!
Smooth and No Lag - It is also a standard no lag recording tool for gaming, online meeting, tutorial and more desktop activities.
Video Editor - The built-in video editing function lets you edit the recording file at will. You could cut, rotate, crop or merge the recording video files. Or add files, effect, watermark, music, subtitle to the video.
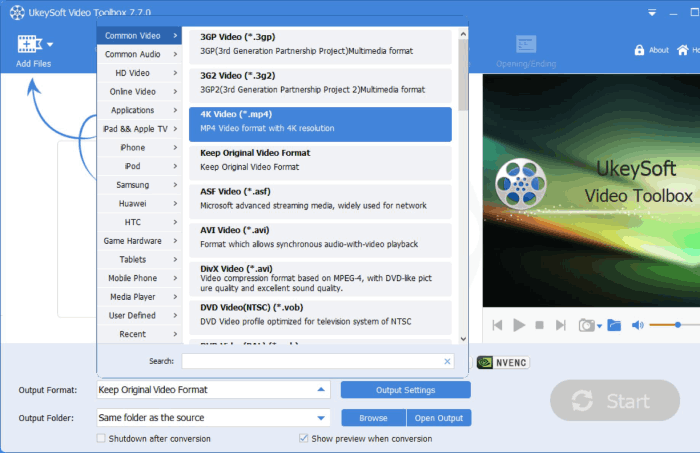
Video Converter - After saving the recording, you can edit and convert the recording file to popular video formats to be compatible with different devices.
Record Screen on Windows 10/11 with UkeySoft Screen Recorder
STEP 1. Launch UkeySoft Screen Recorder
Launch the UkeySoft Screen Recorder on your Windows 10, you can see there are two powerful functions in the program - "Screen Recorder" and "Video Editor".
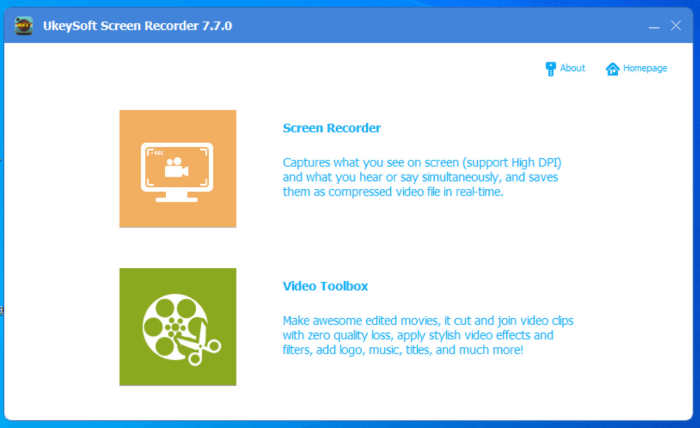
If you want to record screen on computer, please click "Screen Recorder" feature.
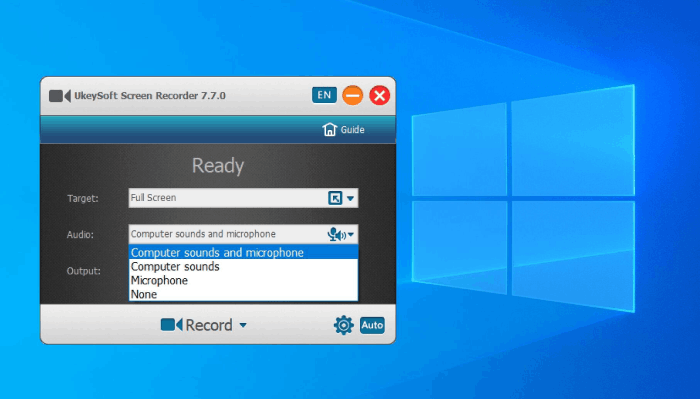
STEP 2. Input Audio Settings
In the pop-up small window, please set audio input option firstly. If you want to record video with audio on Windows 10, you can choose "Computer sounds" only, or record computer sounds and microphone simultaneously.
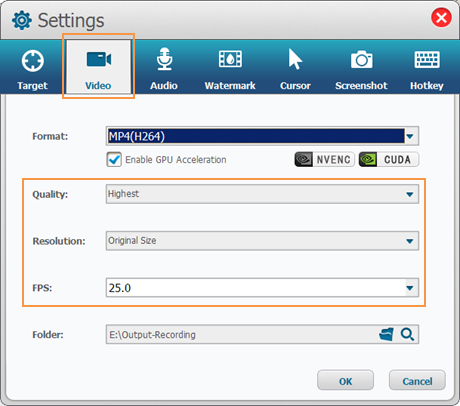
More Customize Output Settings (Options)
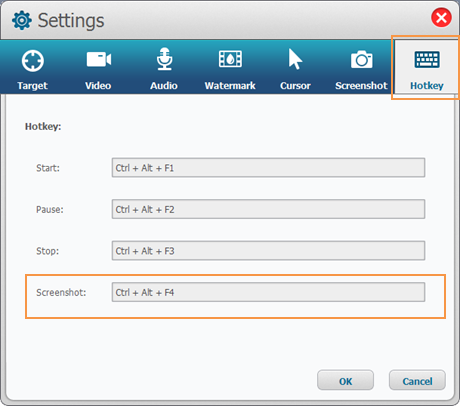
Click on the Gear icon to open the settings window, from where you may set the "Video", "Audio", "Watermark", "Screenshot", etc.
- Adjust the Region
- Hide/Enable Camera
- Take a Screenshot
- Enable "Zoom In While Recording"
- No Watermark
- Add Text/Image Watermark
- Adjust the Quality of the Recording Video
- Adjust System or Microphone Volume
- Enable/Disable Capturing Mouse Cursor
By the way, you may use the "Hotkey" to start/pause/stop the recording, take a screenshot. Then, go back to its main screen recording interface.
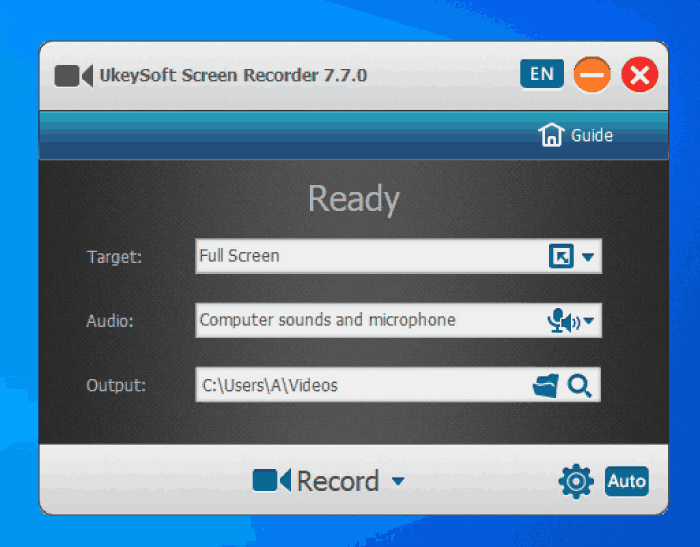
STEP 3. Set up for the Screen Recording
Then, please click "Full Screen", "User-Defined", "Camer@USB" from Target option.

For example, if you want to record a special area in Windows, please click "User-Defined" option and drag the mouse to customize the recording area.

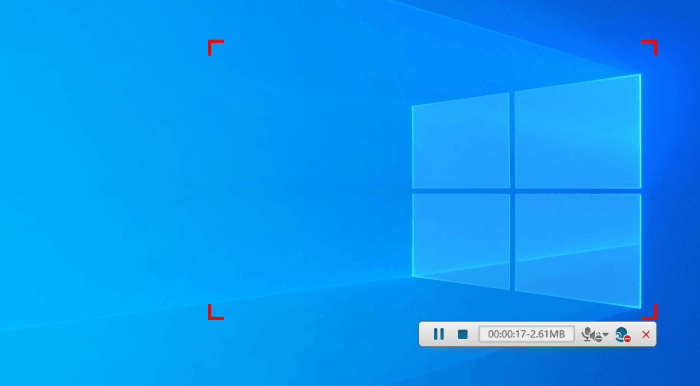
STEP 4. Start Recording Video on Windows 10 or Windows 11
Hit on "REC" button or press Ctrl + Alt + F1 to start your recording.
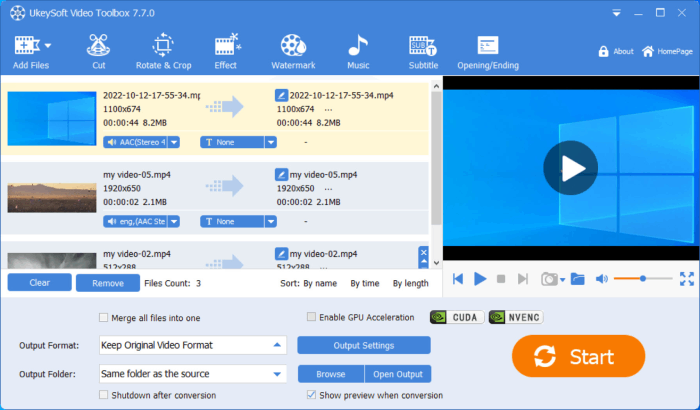
STEP 5. Edit the Recording File (Optional)
When finished, turn back to the main screen of program, select "Video Editor" function. You can edit the recording file effortlessly, or even convert it to other video/audio format for more devices.
With the help of UkeySoft Screen Recorder, you can easily to record HD videos in Windows PC, it offers you the most powerful and useful screen recording solution.
In addition, if you use a Mac computer, you also can try the UkeySoft Screen Recorder for Mac, the app will help you record full screen, custom area, App window, camera video and audio on Mac. With this screen recorder, you can record everything on Mac without Quicktime Player.
How to Screen Record on Windows 10 with Audio via VLC
💡 VLC can record:
● Screen
● Network stream
● System sound
● Microphone
● Webcam
Many of you must know VLC can play videos on Windows for you, but you may not be familiar with its screen capturing with the audio feature. Let's see how to record the screen and audio on Windows 10 via VLC.
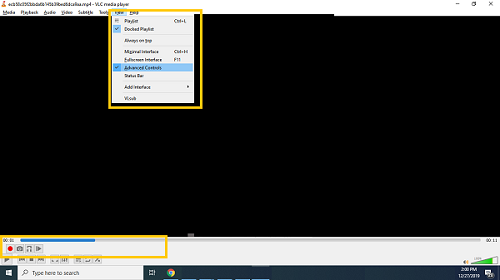
STEP 1. Enable the VLC record button
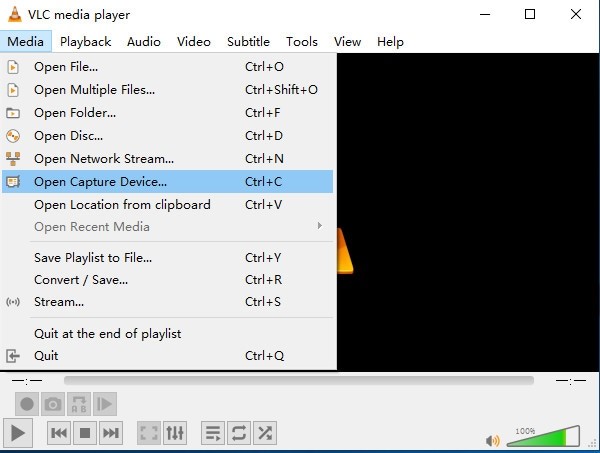
Open VLC media player and move your mouse onto "View" column. Select "Advanced Controls".
STEP 2. Set up for recording screen on Windows 10
Click Media and choose Open Capture Device to prepare for screen recording on Windows 10. On Open Media, Choose Capture Mode as Desktop. Then, you can set your desired frame rate in options section.
STEP 3. Play the audio file
To make your recorded video be with audio, you need to record the audio in advance. Then, tick Play another media synchronously and click Browse… to find the needed audio file.
After you select the audio file, click downward arrow beside the Play button and choose Convert.
STEP 4. Record screen on Windows 10 with audio
Choose Profile as H. 264 + MP3 (MP4), and confirm the output destination. When all has been done, click Start to record the screen on Windows 10.
When you finish, click the Stop playback button (the square icon) to end the recording. You can find the recorded video with the audio you set in the output folder.
Because the main function of VLC is a multimedia player, even if it supports recording screen or video stream, there are many limitations, such as not being able to record screen and webcam together. And if you want to switch between recording screen, recording camera, and recording video stream, it will be very troublesome and require many steps.
If you have diverse Windows 10 recording needs, it is more convenient and suitable for you to use FonePaw Screen Recorder.
Free Download Buy with 20% off
FAQs About Screen Record on Windows 10 with Audio
How to Record Webcam on Windows 10 with Audio?
You can record a webcam and audio on Windows 10 with its built-in application, Camera app, which can help you record your webcam activities following the simple steps below:
STEP 1. Search Camera in the search bar and Click the Recording icon on the right pane to start recording.
STEP 2. Hit "Stop" and you can find the recording in the folder by path: C:\Users\X\Pictures\Camera Roll (replace X with your user name).
If you find your Camera app not working, you can try FonePaw Screen Recorder, which also offers webcam recording mode to capture camera and audio with high definition.
What Is the Shortcut to Record Screen on Windows 10?
To record screen on Windows 10 more conveniently, you can use shortcuts when recording screen with Xbox Game Bar. Here are listed several shortcuts to facilitate the recording process.
- Win + G: Open Xbox Game Bar
- Win + Alt + G: Record the last 30 seconds of gameplay (you can change the amount of time recorded in Xbox Game Bar > Settings)
- Win + Alt + R: Start or stop recording
- Win + Alt + B: Turn HDR on or off
- Win + Alt + PrtScn: Take a screenshot of your game
Shortcuts also apply to FonePaw Screen Recorder, which allows you to customize the hotkeys to start/stop, pause/resume, take a screen capture, etc.

Wrap-up
We've covered how to screen record on Windows 10 with audio with 4 methods, i.e., Xbox Game Bar, VLC media player, UkeySoft Screen Recorder, or FonePaw Screen Recorder.
Xbox is the best for basic recording of a single window on Windows 10, while FonePaw Screen Recorder is the first choice if you want to record your screen with full audio, annotations, multi-windows, or other functions. Considering both simplicity and versatility, FonePaw Screen Recorder is really worth a try.