


There are many situations that you need to transfer photos from iPhone to Mac. For instance, to avoid losing some precious photos, to free up your iPhone storage space or to edit your photos with a professional tool like Adobe Photoshop, then you have to copy photos from your iPhone to Mac.
Here will introduce 5 ways on how to transfer photos from iPhone XS/X/8/7/6s/5s/4s to Mac, like Macbook Air/Pro, iMac. Keep reading to learn more details.
You may also like:
How to transfer photos from iPhone to Laptop (opens new window)
How to transfer videos from iPhone to Mac (opens new window)
Transfer Photos from iPhone to Mac with FonePaw iOS Transfer
FonePaw iOS Transfer (opens new window) is a good iPhone photos transfer tool for you. It supports transferring photos from iPhone to Mac, iPhone to iPhone and iPhone to iPad. Not only photos but also videos, audios, music, contacts, SMS, etc, can be transferred from iOS devices to computer with this powerful software.
Besides, you can use this program to make ringtones (opens new window)and convert HEIC photos (opens new window) on iPhone into JPG/PNG on Mac.
You can learn how to use FonePaw iOS Transfer to import photos from iPhone to Mac by following the instructions below.
Click the following button to free download FonePaw iOS Transfer for Mac.
Free Download Buy with 20% off Free Download Buy with 20% off
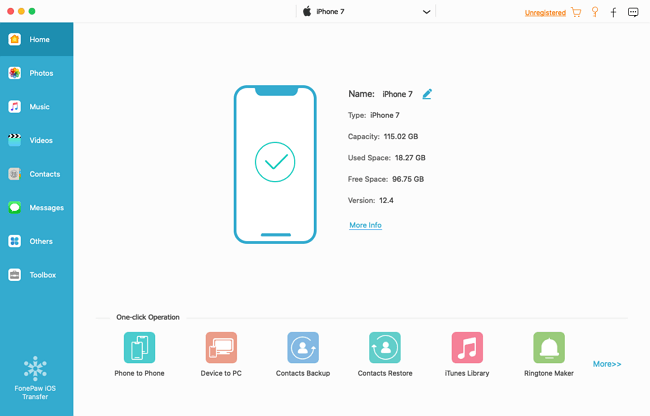
Step 1: Connect iPhone to Mac
After installing FonePaw iOS Transfer, just launch it. When the main window pops up, connect your iPhone to Mac via a USB cable. You will find the program detects your iPhone quickly, and your iPhone will be displayed on the interface.
Step 2: Transfer photos from iPhone to Mac
Click Photos in the left-side menu and select Camera Roll on the pull-down list. Then photos on your iPhone are displayed. Go through the photos and tick the ones that you want to transfer. Right-click the photo and choose Preview to preview the photo before transferring.
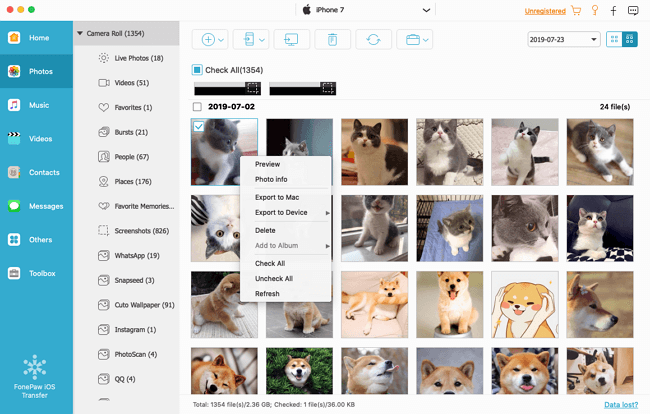
Click the Export button and select Export to Mac, then select the folder you want to save your photos on Mac.
Tip: One-click copy all photos from iPhone to Mac
You can also use this tool to transfer all your iPhone photos to Mac at one time if you want.
- Connect your iPhone with Mac
- Click Toolbox in the left-side menu and then click Device to PC
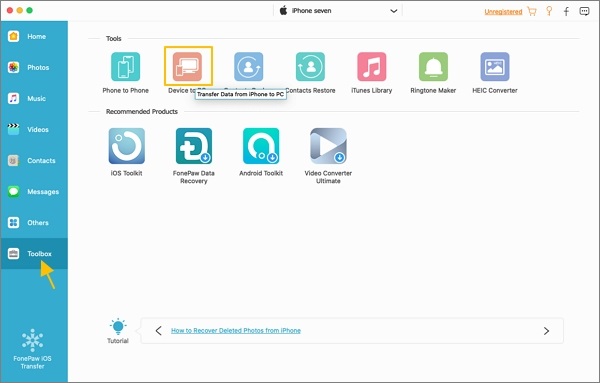
- Select Photos, then click Start and the program will move photos from iPhone to Mac within seconds.

You can also choose a destination folder for your imported photos by clicking the button under Destination.
Import Photos from iPhone to Mac via Photos/iPhoto app
When your iPhone connected to your Mac, the macOS Photos app (Mac OS X Yosemite or later) or iPhoto app will automatically open for you to manage photos. Both of them can be used to export photos from iPhone to Mac. Here's how to do that:
Photos app:
- Connect your iPhone to Mac with a USB cable, run the Photos app if it doesn't open automatically.
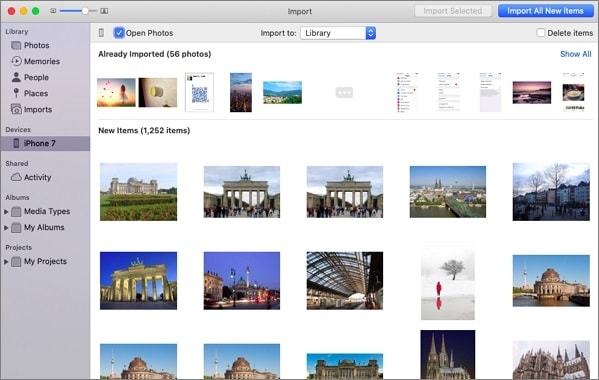
- Click Import on the top.
- Select the photos you want to save to Mac, click Import Selected, or you can also click Import All New Items to transfer all your iPhone photos to Mac.
iPhoto app:
First, connect your iPhone to your Mac and run the iPhoto app. Then pick the photos you want to import. Click Import Selected to import some of the photos or click Import xxx (the number of your photos) to move all photos. Besides, you can add an Event Name for your imported photos before or after transferring.

Get Photos from iPhone to Mac without USB
Apart from using an app, AirDrop is another option for you. It enables you to get photos from iPhone to Mac without using a USB cable. Start by opening AirDrop on your phone and computer.
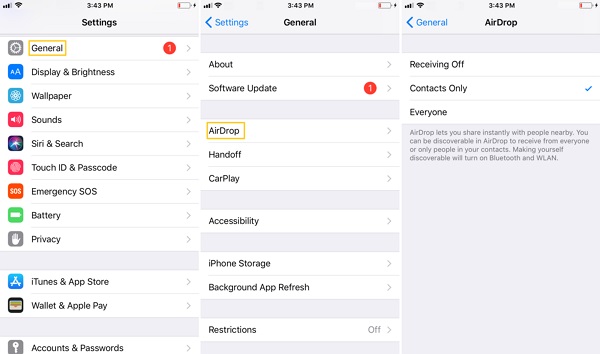
- On your iPhone: go to Control Center by swiping up from the bottom of the screen, tap Airdrop button and then set Contacts Only or Everyone to transfer photos. (You can also click Setting> General> Airdrop to turn on AirDrop)
- On your Mac: click Finder> Go> AirDrop.
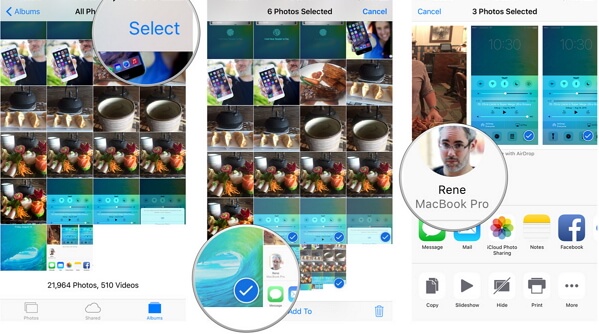
Step 1: Open the Photos app on your iPhone and select the pictures you want to move to your Mac.
Step 2: Tap the sharing button, symbolized with a square with an up arrow.
Step 3: When AirDrop finds your Mac, tap on it.
Step 4: Click Accept to save the photos on your Mac. You can find the photos in the Document folder on your computer.
Upload Photos from iPhone to Mac by iCloud
iCloud is one of the quickest ways to sync photos from iPhone to Mac. To upload photos by iCloud, make sure you have signed in iCloud with the same Apple ID on your iPhone and Mac.
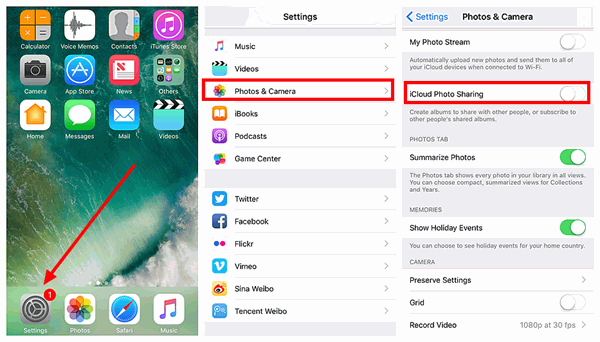
Step 1: Turn on iCloud on your iPhone
Go to Settings, tap on your name on the top and go to iCloud. Select Photos, then turn on iCloud Photos.
Step 2: Set up iCloud Photo on your Mac
Launch the Photos app and go to the Photos menu at the top left of the screen. then click Preferences>iCloud, check the box next to iCloud Photo Library (iCloud Photos in macOS Mojave).
After setting, your photos will automatically sync between your iPhone and Mac.
Note: iCloud has a limit on storage space, if you have used up the free 5GB, you'll need to buy more to make sure iCloud has enough space to store your iPhone photos.
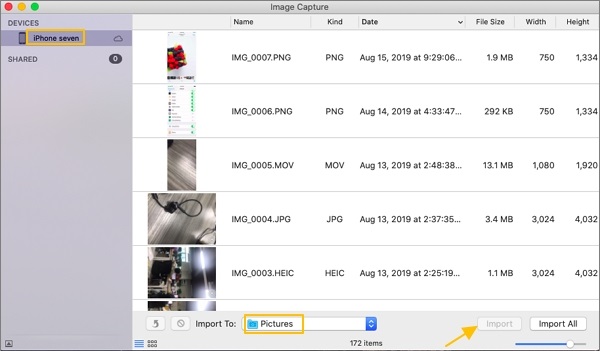
Copy Photos from iPhone to Mac using Image Capture
Another way to copy your photos from iPhone to Mac is by using Image Capture.
Step 1: Launch Image Capture on your Mac and then connect your iPhone to the computer.
Step 2: Select your iPhone in the device list.
Step 3: Choose a destination folder for your iPhone photos under the Import To option.
Step 4: Click Import to transfer your selected photos from iPhone to Mac, or click Import All to move all photos to Mac.