


I believe that transferring photos from iPhone to an external hard drive is always a wise choice. For one thing, it back up iPhone photos to the external hard drive and prevent permanent loss. For another, it saves your computer when you find available storage is starting to wane, assuming that you plan to transfer iPhone photos to a computer (opens new window) at first.
Better yet, by copying photos from iPhone/iPad to an external hard drive, you can view these photos on any computer since it is very convenient for you to bring this external photo storage for iPhone everywhere. In this guide, you'll discover three reliable ways to transfer photos from iPhone to external hard drive on Mac or Windows. And you may find out the best way to store photos from iPhone that fit you most.
Don't Miss Out:
- How to Transfer Photos from iPad to Android Phone (opens new window)
- Copy Files from iPhone to Windows 10 (opens new window)
Transfer iPhone Photos to External Hard Drive on Windows/Mac (Easiest Way)
FonePaw iOS Transfer (opens new window) is a tool that provides the easiest way to transfer iPhone photos to an external hard drive. This program allows users to transfer many types of files, including moving photos from iPhone to internal disks on Windows or Mac computers (opens new window), external hard drive or flash drive (opens new window).
Images in Camera Roll, Photo Library and other photo albums on your iPhone can all be transferred to the external hard drive in batch with ease. Better yet, you can move other large files, such as videos, movies, TV shows, etc. from iPhone X/8/8 Plus/7 Plus/7/6 to external drive and bring them to anywhere.
You can download the free trial version of FonePaw iOS Transfer on your computer based on the operating system - Windows (10/8/7/Vista/XP) or macOS (Catalina/Mojave/High Sierra/Sierra/El Capitan/Yosemite). Now, just follow the steps to move pictures off iPhone to the hard drive for iPhone.
Free Download Buy with 20% off Free Download Buy with 20% off
SETP 1. Connect iPhone 11/Xs/Xr/8/7/6s to PC/Mac
To begin with, connect your iPhone to your PC or Mac and launch the program on the computer. Then it will detect your device and show it in the program as the below interface. Click More Info to get your device's details.

STEP 2. Connect External Drive to Computer
Now, connect your external hard drive to computer. You'd better scan your hard drive for viruses to protect your computer. And make sure the external hard drive has enough memory for the photos you want to export.
STEP 3. Transfer Photos from iPhone to External Hard Drive on Windows/Mac
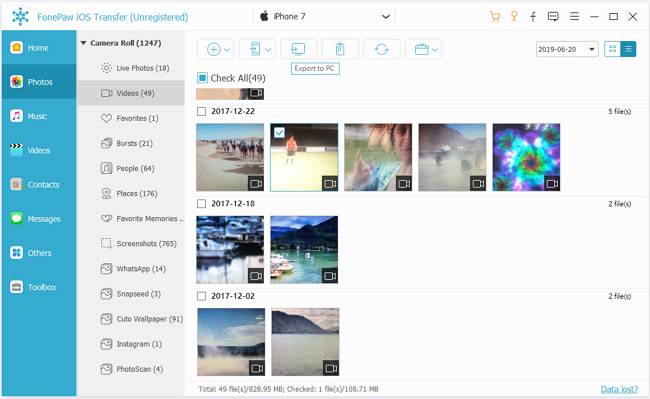
When your iPhone is showing on the window of FonePaw iOS Transfer, and your external hard drive is recognized by your computer, click "Photos", which is at the left panel of the program main window.
Now, you can see all photo albums on your iPhone. When you click any of the albums, the photos in the album will appear. You can select any photos you want to transfer to a USB external hard drive. Click "Export to PC" option. In the next pop-up dialogue, select your external drive as the output destination.
Note that you can also back up iPhone photos to computers in this way.
Bonus: Move Videos/Movies from iPhone to External Hard Drive
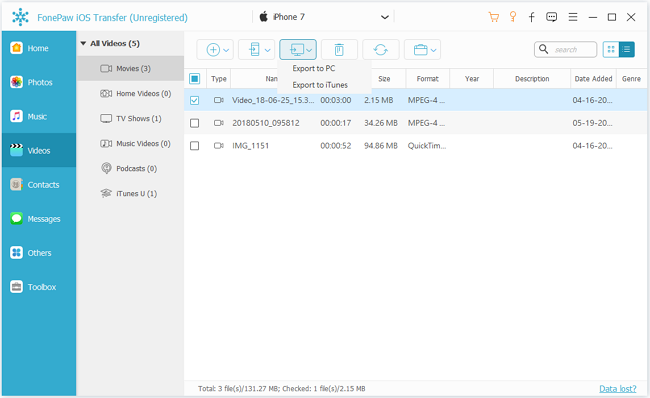
Except for photos, videos (especially 4K videos) and movies can occupy your iPhone. Why not move them to the external drive, too?
To move iPhone videos/movies to an external drive, click "Photos" and then choose the "Videos" album (for those not captured by iPhone camera, select "Videos" directly). Here you can see all the videos took. Select those you want to move and right-click "Export to PC".
Download and Move iPhone Photos to External Hard Drive (May Eat Your Time)
Except for the convenient method mentioned above, you can also download iPhone photos from iCloud and then export the photos to the external hard drive.
STEP 1. Enable iCloud sync feature for photos on your iPhone.
STEP 2. Use your iCloud account to log in on iCloud.com or iCloud program.
STEP 3. Choose Photos and wait till all photos are loaded.
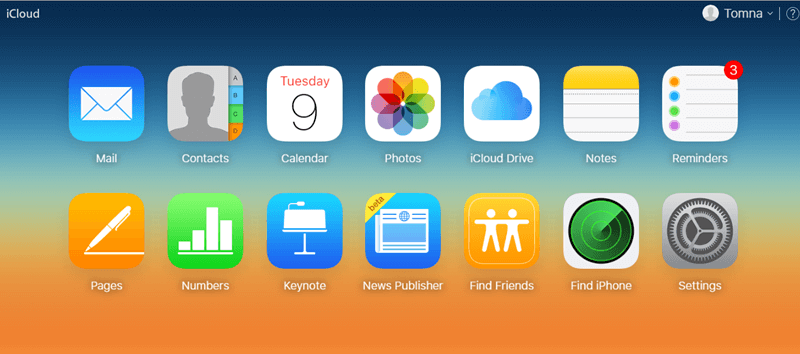
STEP 4. Select the photos you need and click "Download selected item" button. It might need a few minutes if there are lots of pictures.
STEP 5. Connect your external hard drive to Windows PC/laptop or Mac and copy all the pictures to the drive.
STEP 6. If you don't need the pictures on the computer, you just delete the photos.
Export iPhone Photos to External Hard Drive on Windows and Mac
You can also use the default program on Win PC or Mac to export iPhone photos to external hard drive. However, the method can only be applied to photos in Camera Roll. If you have app photos or downloaded photos, you may use the above two methods. Now, you can follow the steps below to export pictures to an external drive from iPhone.
# Import iPhone Photos to External Hard Drive with Windows Photo Gallery
STEP1. Connect your iPhone to the PC.
STEP 2.
- If you are using Windows 7, the AutoPlay window will pop up. Select "Import pictures and videos using Windows" and then click "Import" to import the Camera Roll photos to PC.
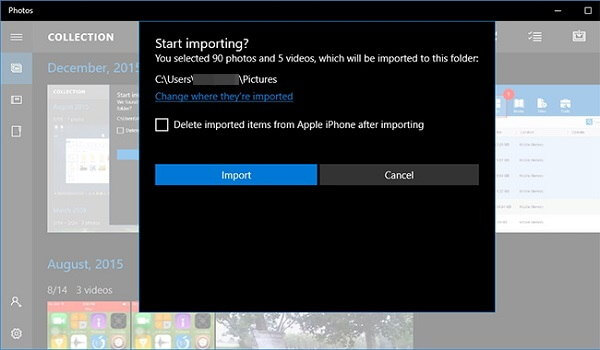
- If you are using Windows 10, Launch Photos app, and hit the import button. You can then select items to import to PC.
STEP 3. Plug your external hard drive to the computer and move iPhone photos from PC to the drive.
# Import iPhone Photos to External Hard Drive with Image Capture on Mac
STEP 1. Connect both your iPhone and external hard drive to your Mac.
STEP 2. Use Spotlight search to search for "Image Capture" and launch the program.
STEP 3. Click the name of your iPhone and all the photos taken by your iPhone will be displayed.
STEP 4. On the "Import To" bar, select your external hard drive as the output destination.
STEP 5. To import only some of the photos, select the photos, then click "Import". To import all the photos, click "Import All".

Transfer Photos from iPhone to External Hard Drive without Computer?
To transfer photos from iPhone to an external hard drive without a computer, it means that your iPhone have to connect to the external drive directly. Is it possible?
It's possible since the iOS 13 and iPadOS update. The update brings support for external drives to iPad and iPhone. To connect the iPhone with an external hard drive, you'll need:
- iPhone runs on iOS 13 and above;
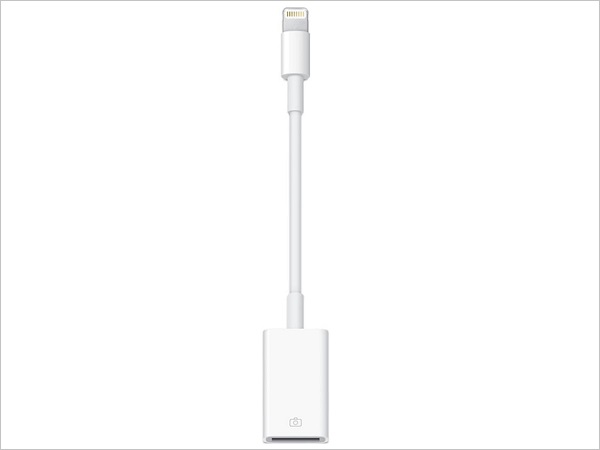
- Apple's Lightning-to-USB or Lightning-to-USB 3 camera adapters.
Then you can follow these steps to transfer photos from iPhone to external hard drive without using a PC or Mac.
STEP 1. Connect your external hard drive to your iPhone with a lightning to USB adapter. You can check the connected hard drive through Files app > Browse.
STEP 2. Open the Photos app and select the needed photos. Tap the Share button to save the pictures to the Files app.
STEP 3. Now on the Files app, select the connected hard drive to save the iPhone photos.
The above four ways are all about how to import photos to the external hard drive from iPhone. Can't decide which methods you should choose? The tablet below can give us the answers. FonePaw iOS Transfer (opens new window) is no doubt the most convenient and powerful method while the other two all have their limitations. Also, to avoid photo loss, you really should back up photos from the iPhone to a reliable place.
iOS Transfer | iCloud | Photo Gallery/Image Capture | |
Supported Photos | All Photos | All Photos | Camera Roll Photos |
Internet Connection | Unrequired | Required | Unrequired |
Transferring Speed | Fastest | Slowest | Medium |
So what is the best way to save photos from iPhone to external hard drive for you? Just share what you think on the below comment box!
Free Download Buy with 20% off Free Download Buy with 20% off