"How to import photos from iPhone to Windows 10? I know there are lots of methods to copy iPhone pictures to computer including using iTunes, AirDrop, iCloud Photo Library, etc. But I am such a dawdler and I don't want to try all of the methods only to find out which one is the simplest. So I am looking for a guide that can help transfer photos from iPhone 6 to computer in several simple steps...”
Nowadays many people are obsessive about photo-taking with their iPhone X/8/7/7 Plus/ SE/ 6s. Due to limited storage, a question like "How to export pictures from iPhone to computer?" comes to bother many users. Actually, there are several methods to do this transfer. You can use the old fashioned way – connect iPhone with computer and launch iTunes to sync or use Auto-Dialog. Or you can use iPhoto or Aperture to import photos. Or maybe some of you enable iCloud to sync pictures.
Today, if you just need to quickly transfer one or two photos from iPhone to computer, or export iPhone photos to your friend's computer, the above methods seem not to be convenient enough. Here we introduce five fast and easy ways for you. That's using FonePaw DoTrans (opens new window).
So in this guide, I would like to show you five methods, which have been tested to be the most convenient ones, to download photos from iPhone 11/XS/XR/8/7/6 to a computer, other iPhone models are included, of course.
Don't Miss Out:
- Best Photo Recovery Software: Recover Deleted Photos from Computer (opens new window)
- How to Transfer Photos from iPhone to iPhone? (opens new window)
Tutorial 1: Transfer Photos from iPhone to PC without iTunes
Before you can put iPhone photos on computer, you need to free download the trial version of iPhone to PC transfer - FonePaw DoTrans (opens new window) on your computer. It can also be used to transfer photos from iPhone to iPhone, from iPhone to Android phone (opens new window) and more.
Free Download Buy with 20% off
Now, you can follow the below steps transfer photos from iPhone to Windows PC.
1. Launch FonePaw DoTrans and Plug iPhone into Computer
First of all, install and run DoTrans on your computer. Then plug your iPhone like iPhone XR, iPhone XS, etc. into computer with USB cable and soon you'll see the home interface of DoTrans.
Note that if your iPhone is not showing up on computer (opens new window), click in and see the solutions.

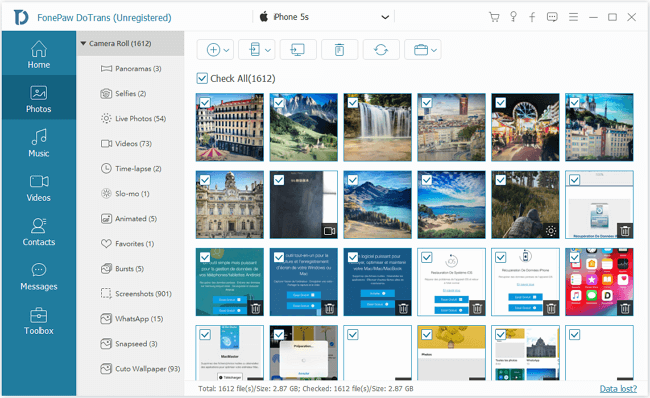
2. Click to show iPhone photos in album
Now you need to choose the album belonging to "Photos" at the left side. Here you can see albums such as Camera Roll, Photo Library, Video and so on. Click "Camera Roll", you can see all photos on this folder.
3. Preview photos one by one
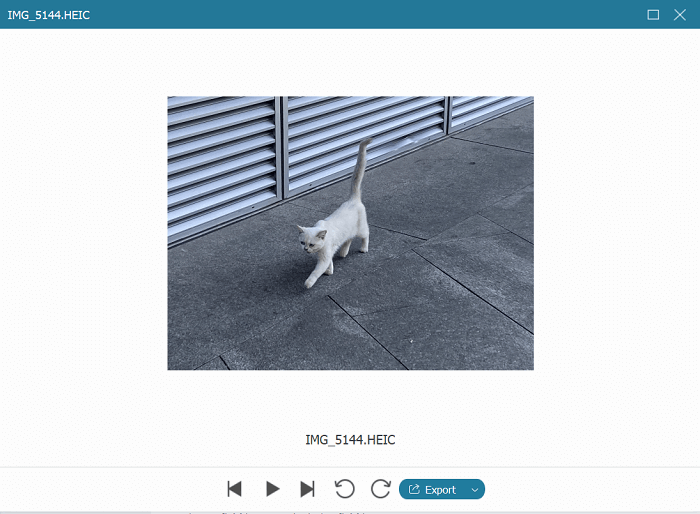
You can click any photo and preview them before exporting. Now, right-click the picture and choose "Preview" to play photos.
4. Transfer Photos from iPhone to Computer
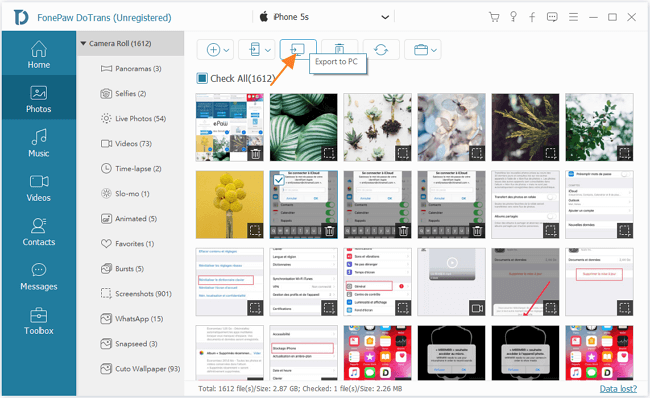
Tick those photos you want to transfer and click "Export to PC" one by one. Then in a pop-up window, select a folder to save your photos. In this way, you are able toexport photos from iPhone XR/X to computer.
See also: How to Transfer Photos from PC to iPhone (opens new window)
Tutorial 2: Import Photos from iPhone to Windows 10 PC
Windows Photos would be a handy tool for you to transfer photos from iPhone to PC. Follow the steps:
Step 1 Connect your iPhone to the PC via USB cable.
Step 2 Press the Windows key and search for Photos on the computer.
Step 3 Click Import in the top-right corner of the window and choose from a USB device.
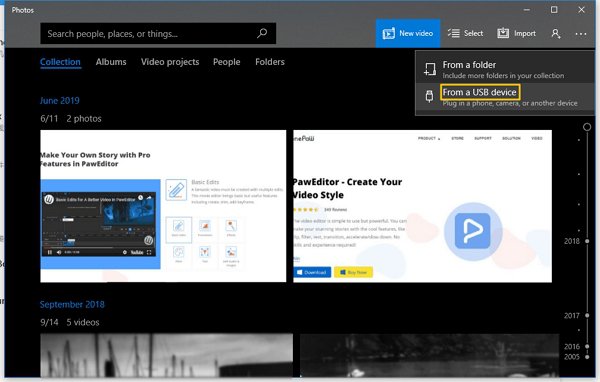
Select the items you need to transfer from iPhone to the computer, and the photos will be saved in your Pictures folder.
Tutorial 3: Copy Photos from iPhone to Windows 7/8
Before you try transferring photos from iPhone to the PC, you should be noticed that only Camera Roll photos can be transferred via AutoPlay. Besides, the photos are shown in the disorder.
Step 1 Connect your iPhone to the computer via USB cable.
Step 2 When the Autoplay window shows up, select Import pictures and videos.
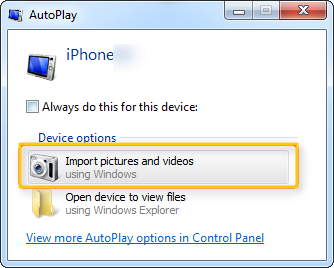
Step 3 Click Import Settings > Import images to [your Camera Roll] > OK.
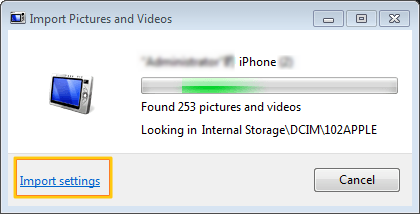
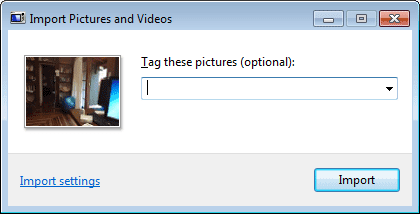
When the system found the items on your iPhone, click Import to download photos from iPhone to PC.
Tutorial 4: Move Photos from iPhone to PC
You can copy photos from iPhone to PC with Windows Explorer because Windows can read the DCIM folder of iPhone. But just like transferring via Autoplay, it only moves your Camera Roll photos from iPhone to the PC, and the photos are disordered. Here is how to do:
Step 1 Connect your iPhone to the computer.
Step 2 Go to This PC/Computer > Find your iPhone under Devices and drives.
Step 3 Double click your device > DCIM. Open it to see if your photos in this folder.
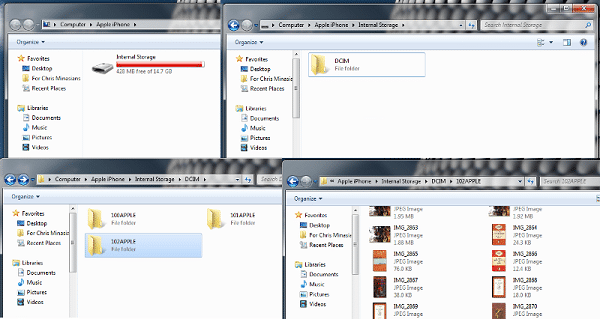
Step 4 Select the photo you need > drag or copy and paste them to the folder on your desktop.
Tutorial 5: Export Pictures from iPhone to PC via iCloud Panel
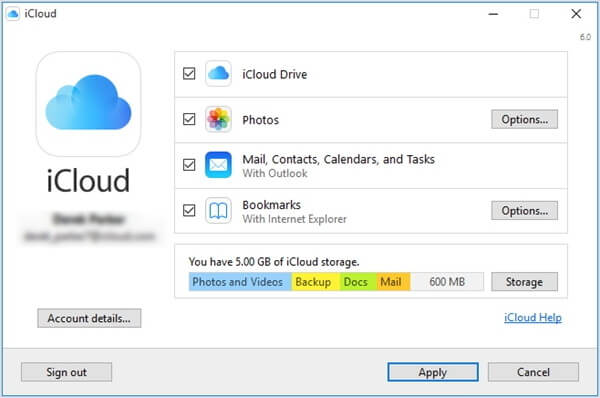
iCloud Panel is also known as iCloud for Windows, compatible with Windows 7/8/10. It helps sync photos from iPhone to PC. To use this tool, you should ensure that you've turned on "iCloud Photo Library" on your iPhone whatever. Without iTunes or connection of internet, photos can be moved to a computer without a hitch. If ready, learn your way around this panel by the instructions to download photos from iPhone to a PC.
Step 1 Above all, please have "iCloud for Windows" installed on your computer.
Step 2 Launch "iCloud for Windows".
Step 3 Now, click on and select "Options" behind "Photos".
Step 4 From the pop-up window, tick up "iCloud Photo Library".
Note that you can change the default route under this option.
Step 5 Click on "Done" and select "Apply".
Step 6 Re-open up "iCloud for Windows" and choose "Download Photos". Now, your photos start to being downloaded. After that, you can view pictures on the folder you selected. And in this way, you can add iPhone photos to computer.
Now you can view your iPhone photos on computer. With FonePaw DoTrans for iOS (opens new window), you can not only transfer photos from iPhone to computer, you can transfer them back. That's to say, you are allowed to put photos on your iPhone from computer (opens new window). Of course, choosing which way to transfer iOS photos to PC is totally up to you! If you have any problem during the process, just leave us a comment below!


