You may have the habit of deleting useless phone calls regularly but remaining these important calls to keep your iPhone clean. However, some people are unexpectedly suffering from mistakes when they delete those important ones or meet the call log "gone" issues after system updates.
Fortunately, this is not a big deal because iPhone call history recovery is absolutely possible. In this blog, the ultimate methods in helping you to recover call history from iPhone will be introduced. You can check them and pick the ideal option to apply.
1. How to Recover Deleted Call History Without Backup
Many people may consider that recovery also requires an original backup. But what if you haven't got the time to back up your call history in advance? Don't worry! This problem can be easily fixed by the powerful third-party data recovery software, FonePaw iPhone Data Recovery.
FonePaw iPhone Data Recovery provides several optional modes for you to easily recover different types of data from your iPhone if you suffer from a sudden lost. It is able to recover multiple file types, and call history is included. With this tool, you can easily view and find back the call history that is accidentally deleted or is too old to be shown on your iPhone.
Besides, you are able to tailor to your encountering scenario and select the appropriate recovery mode to retrieve your data again without hassle. Also with an intuitive interface, FonePaw iPhone Data Recovery will be an ideal option even you are a green hand in dealing with iPhone data recovery. Check the video below and learn more about it.
Free Download Buy with 20% off Free Download Buy with 20% off
Features of FonePaw iPhone Data Recovery
- Recover call history from iOS devices directly, iTunes backups, iCloud backups, and synced data;
- Support previewing call history before recovery;
- Allow partly recovering call history;
- Recover call history fast and in high success rate;
- Intuitive interface and easy operation to easily get started.
The following tutorial will guide you to recover deleted call history via FonePaw iPhone Data Recovery within clicks.
STEP 1. Install FonePaw iPhone Data Recovery
To get started, you should install FonePaw iPhone Data Recovery to your Windows/Mac device. When the installation completes, you are able to launch the software and connect your iPhone to the device using a USB cable. Then, FonePaw iPhone Data Recovery will sync with it.
STEP 2. Scan Your iPhone
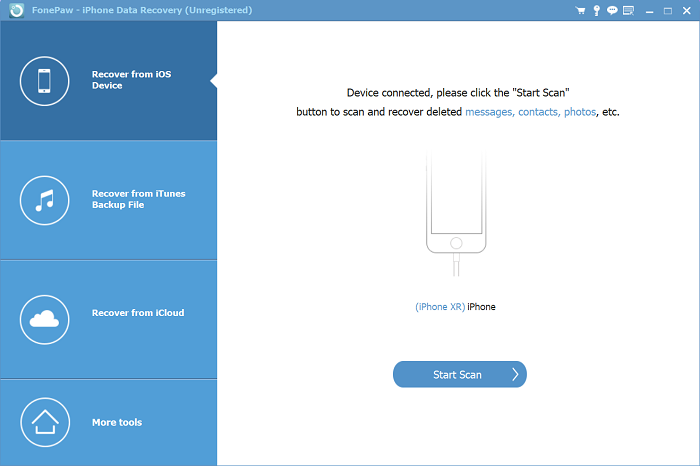
When the connection is completed, select the "Recover from iOS Device" mode and submit "Start Scan" to detect the call deleting history on your iPhone device.
STEP 3. Preview and Select Call History
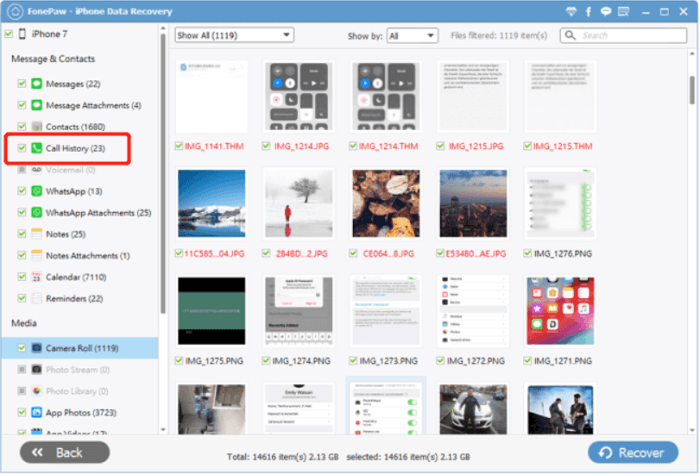
After the scanning process is over, FonePaw iPhone Data Recovery will bring you to the data preview window for accessing all the data such as call history, messages, notes, etc. for selecting to recover. You should choose Call History and preview for choosing the records you desire to recover from your iPhone.
STEP 4. Recover Deleted Call History
Finally, simply hit the "Recover" icon, and your selected call history will be recovered as an HTML or CSV file to your desktop locally.
2. How to Retrieve Deleted Call History from iTunes Backup
If you have the habit of backing up iPhone data with iTunes, you are also able to retrieve the deleted call history from iTunes backup. FonePaw iPhone Data Recovery also provides a recovering mode to achieve this. Let's see.
Free Download Buy with 20% off Free Download Buy with 20% off
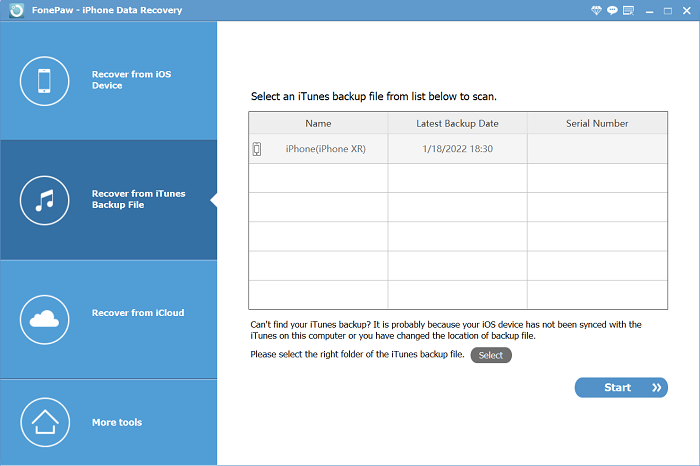
STEP 1. After launching FonePaw iPhone Data Recovery, select "Recover from iTunes Backup File" mode to continue.
STEP 2. When all your preserved iTunes backup files are listed on the right side, select the latest version and hit the "Download" icon to access the saved data.
STEP 3. Now, you are able to select the Call History for restoring it to your device or PC immediately.
 NOTE:
NOTE:Regular iTunes version: C:\Users\AppData\Roaming\Apple Computer\MobileSync\Backup
iTunes installed from Microsoft Store: C:/Users/User Name/Apple/MobileSync/Backup
3. How to Get Back Deleted Call History from iCloud Backup
As you may notice, FonePaw iPhone Data Recover even gives the option to recover call history from iCloud backup. If you are accustomed to using iCloud for preserving mobile data, the following steps show you the detailed operations.
Free Download Buy with 20% off Free Download Buy with 20% off
STEP 1. Open FonePaw iPhone Data Recovery and switch to "Recover from iCloud Backup File" mode.
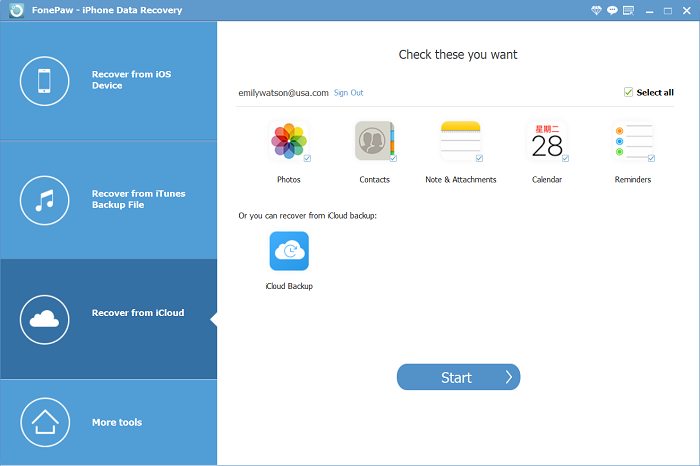
STEP 2. Now, you are requested to log in to your iCloud account for accessing the data you have synced with the service.
STEP 3. Then, you are able to select to recover call history from iCloud synced data or the iCloud backup file.
STEP 4. If you select to recover from an iCloud backup file, select the option and you will be guided to download the iCloud backup file you need.
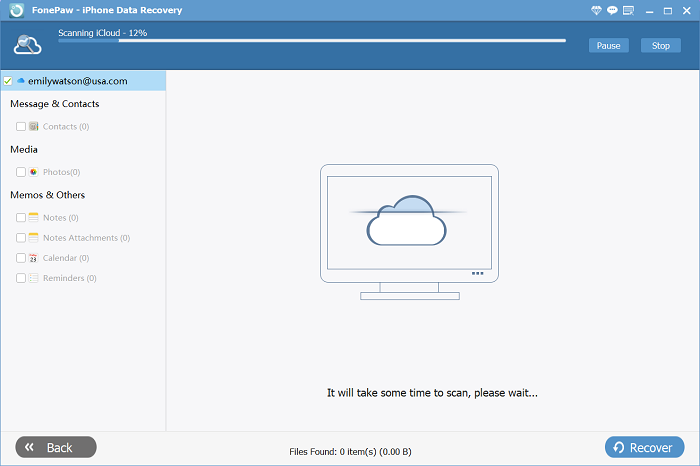
STEP 5. After FonePaw iPhone Data Recovery scans the backup file, you are able to select Call History and also the records to recover.
4. Can You Recover Call History on iPhone Without Computer
If you don't want to install extra software for recovering the call history to iPhone, there actually a way to get the call logs or call history data retrieved without using a computer. You just need to follow the steps below to recover the important phone calls history on iPhone in a straightforward way.
 NOTE:
NOTE:- You have to ensure that you have turned on the iCloud backup functionality on your iOS device ahead of all.
STEP 1. Navigate to "Settings" > [device name] > "iCloud" > "Manage Storage" > "Backups".
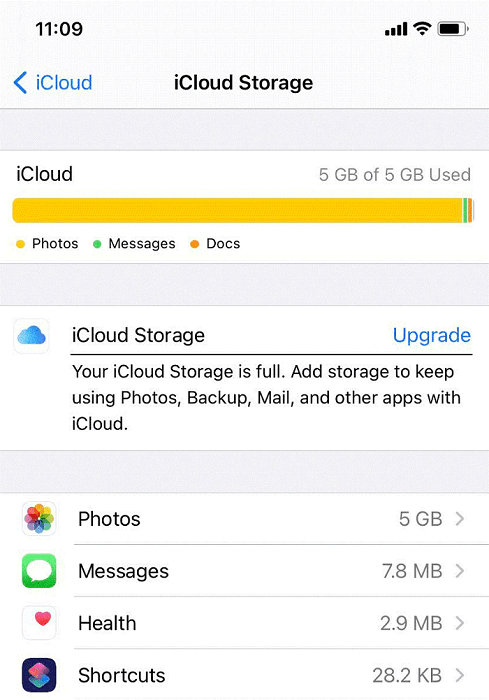
STEP 2. Then, you need to go to "Settings" > "General" for selecting the "Reset and select Erase all Contents and Settings" option.
STEP 3. Now your iPhone will automatically restart after completing the above steps. When the iPhone restarts, remember to select "Restore from iCloud Backup" as the "Apps & Data" notification pops up.
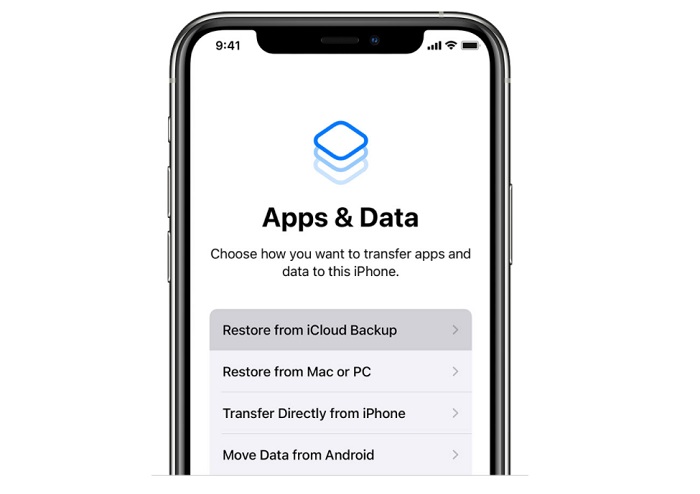
STEP 4. Finally, just log in to your iCloud account and select the backup version you want to recover. When the process completes, you can get the call history back on your iPhone again.
5. FAQs on iPhone Call History Recovery
Surrounding the iPhone call history recovering action, you may come up with certain questions concerning about. The following FAQs are able to help figure out your confusion. Take a look now.
Q1: How to view call history on iPhone?
It’s easy to check your call history on iPhone with the Phone app on your iPhone. You just need to tap the Phone icon and choose Recents column. Here it will present 100 most recent call history, and if you want to know the details of the call history, tap the i icon on the right.
Q2: Is it possible to export and save existing call history on my computer?
Absolutely. If you desire to output the call history for preserving on your computer, you are available to recover the call history and output the records in an HTML file to your computer via the help of FonePaw iPhone Data Recovery.
Q3: How long does Apple stores your call logs?
For the call logs preserved on your iPhone, Apple sets no time duration like how long you can store the calling records exactly. But the device is able to save the last 100 calls for you. If you want to access the calls history back further, you are required to access your cellular carrier for the call log/billing statement.
Final Words
Even though some unexpected methods may result in the possibility of losing some important call history records on your iPhone, this blog can help you recover them easily in different ways. You just need to pick up the most convenient one to try. In this way, you don't need to worry about losing any important calling records on your iPhone again!


