If you have stored your photos on a portable Android phone or tablet, you can view them anywhere and anytime. However, since the storage memory is limited, and your Android device could be lost or broken, it is safer to transfer important photos from Android to computer to make a backup.
There are multiple methods to transfer pictures from Android to PC, whether by USB connection or Wi-Fi. Here are 4 easy ways to transfer pictures from Android to PC.
Method 1: How to Transfer Photos from Android to PC with DoTrans
The very first method we want to share is using the powerful third-party tool, FonePaw DoTrans (opens new window), the best way to transfer photos from Android to PC. You can view its powerful features here:
- Organize photos and other data on Android by categories and folders for easy management
- Help locate the picture without going through the gallery or switching between the DCIM and picture folders
- Good compatibility for Android devices including Samsung, Pixel, LG, HTC, Huawei, etc.
- Also support transferring photos and other files across Android, iPhone and PC
Now, let’s learn about how to download pictures from Android phone to computer with FonePaw DoTrans. You can either watch the video tutorial or follow the steps written below.
STEP 1 Download and run DoTrans on your PC. It's free to download.
Free Download Buy with 20% off
STEP 2 Run the tool and connect your Android device to PC with a USB cable and follow the on-screen instruction to enable USB debugging (opens new window), which allows the tool to read photos and other data on your device.
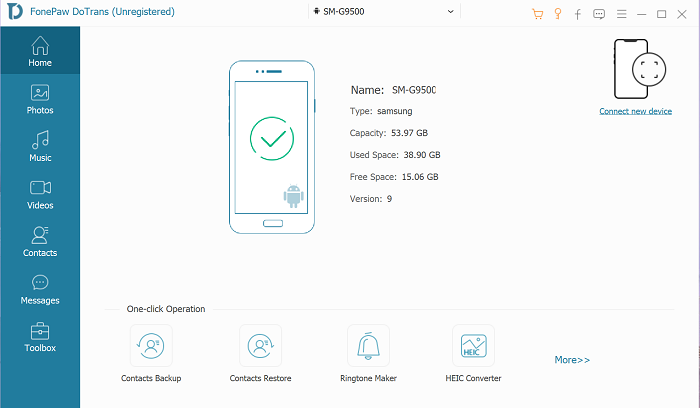
STEP 3 DoTrans will display all your Android data by category. Select Photos, tick all photos you want to transfer to PC and click Export to PC.
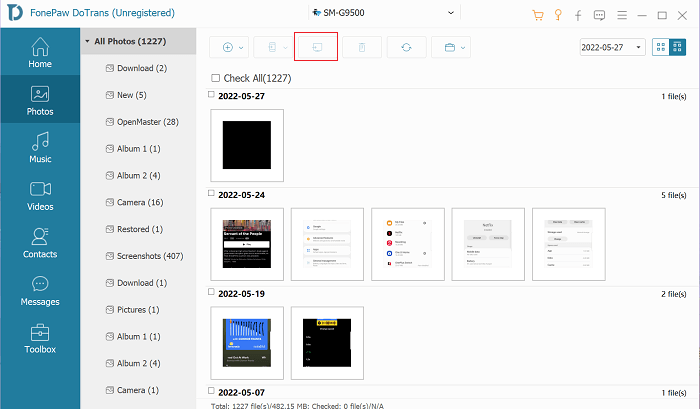
STEP 4 Select a folder on your computer to save the Android photos and click OK. The photos will be transferred from Android to the computer in no time.
You can preview, delete photos or create and manage photo albums of Android on PC via DoTrans.
Method 2: How to Transfer Photos from Android to PC Using USB
The most direct way to transfer photos from phone to computer is using a USB cable. Although you can import photos to Windows PC via a USB cable without any software, it’s better that you use some tools to help you simplify the transfer. Here we mainly introduce 2 useful ways to you.
1. Move Pictures from Android to PC with File Explorer
You can transfer pictures from Android to laptops via the old-school method - manually copy photos from Android phone on Windows File Explorer.
Step 1: Connect your Samsung, Pixel, Moto or other Android phones to PC with a USB cable.
Step 2: Unlock your Android phone, navigate to the Notification Center and tap MTP/PTP/Transfer images/File Transfer as the USB option.
Step 3: When your mobile phone is successfully detected, open File Explorer and go to My Computer.
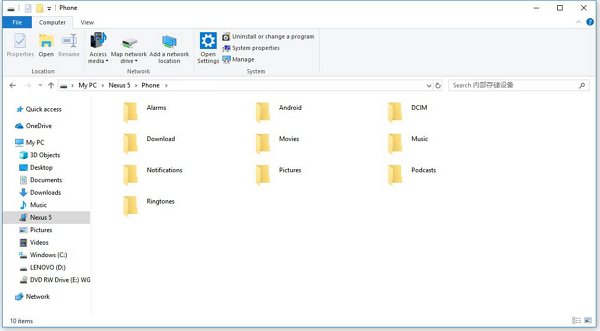
Step 4: Find a new drive that has the brand/name of your Android phone, for example, GT-I9300. Then enter Phone. There are multiple folders on the Android phone that could contain your photos.
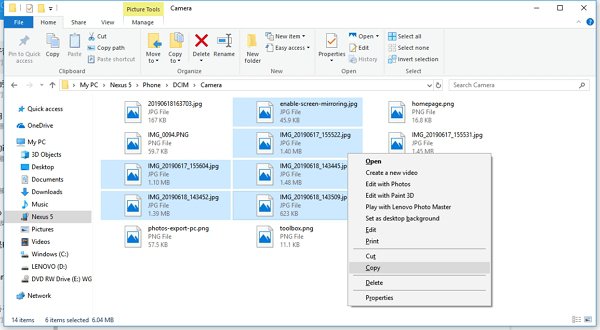
- DICM/Camera: the photos taken by the phone camera;
- DICM/Screenshots: screenshots from the Android phone;
- Pictures/Photos/Images: photos from other sources.
Step 5: Ctrl click multiple photos and copy or drag the photos to a folder on your Windows PC.
2. Import Pictures from Android to PC via Microsoft Photos
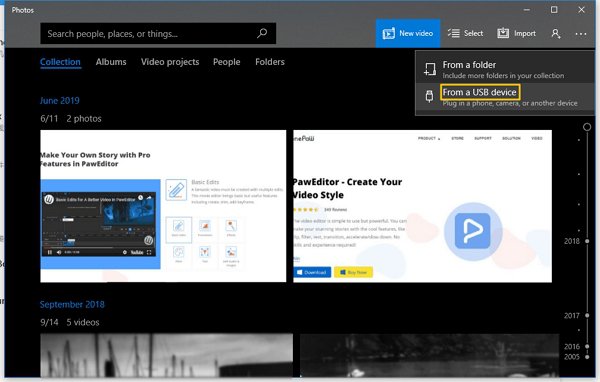
Windows 10 Photos app can import photos/videos from Android devices or other USB drives. Just plug the Android phone into the computer, select the PTP/MTP USB option, and you'll have the option to import photos and videos to Windows PC. However, Microsoft Photos doesn't provide a preview of the Android photos and the photos are organized by year/month, so it is a little hard to find the needed photos. (Switch to DoTrans (opens new window) for a more effective way to transfer data)
Step 1: Use a USB cable to connect your Android phone to PC.
Step 2: Open Start menu and find Photos. Run the program.
Step 3: Click Import > From a USB device. The program will load photos and videos from your Android device.
Step 4: Select the all the needed photos and click Import Selected to import them to your Windows PC.
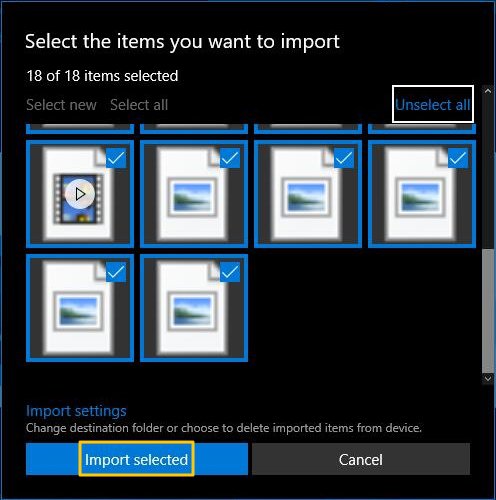
You can find the imported photos from Android on the Picture folder of your computer.
Method 3: How to Transfer Photos from Android to PC Using Wi-Fi(No USB)
Sometimes, you may want to transfer photos from Android to a computer without USB cable because you don't have a cable on hand. There are many ways you can download photos from Android to PC via Wi-Fi. In this part, we’d like to recommend the helpful and convenient one: Google Drive.
Google Drive don’t need a USB cable or other tools. It only requires good network that ensures the smooth transfer. You can check the simple guide below to transfer pictures from Android to PC.
Step 1: Open the Play Store and install Google Drive on your Android.
Step 2: Open Google Drive on the phone and click the "+" icon to upload files or folders.
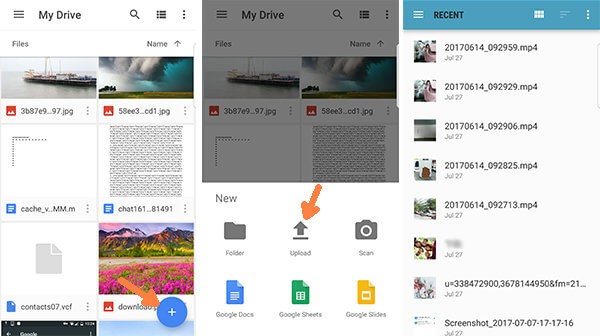
Step 3: On your PC, you can either install Google Drive for Windows or go to Google Drive via any Browser to download the pictures from Android.
 Tips:
Tips:- Except for Google Drive, the above methods only work for transferring photos from Android to Windows PC. If you are using a Mac computer, you can transfer photos to Mac with the help of Android File Transfer (opens new window). Also, if you have a Samsung device, there is Smart Switch, Samsung's official data management tool that can help you transfer files between Android and Mac.
Conclusion
All these methods are really simple, right? Choose whichever one that you want and start to export photos from Android to PC.


