Never leave your glorious gaming moments unknown. In this post, we're going to show you how to record gameplay on PC Windows 10 and it'll not affect any of your gaming experience. All you need is to focus on the championship and find your way to make it out. There are 3 best ways to record gameplay, and you may want to find your preferred way to get started.
How to Record Gameplay on Windows 10 with Xbox Game Bar
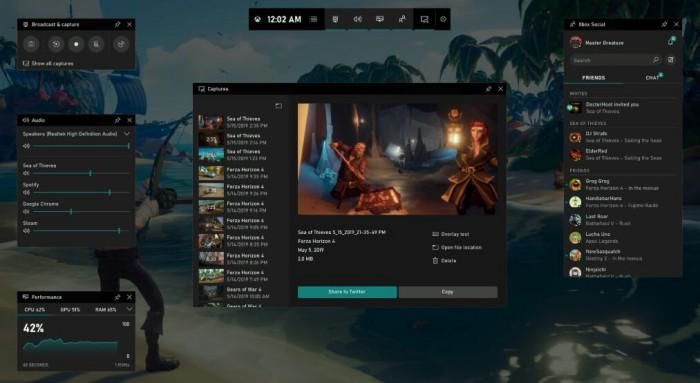
If you don't want to install any third-party screen recorder, you should try Xbox Game Bar. This is a preinstalled screen recorder dedicated to recording almost all PC games on Windows 10 and 11. It comes with a few widgets to help you get the best gaming experience. The Xbox Social widget allows you to engage with other players and coordinate your next session in real-time. Also, it integrates with Spotify, so you can enjoy your favorite tunes when having fun in a virtual world.
However, Xbox Game Bar only allows a maximum recording of 30 minutes. What's more, it doesn't include any editing features for post-processing. Another drawback is that you cannot add a webcam overlay when recording PC games, so you can only interact with your audience with a microphone. Now, let's see how to screen record with Xbox Game Bar.
STEP 1. Press Win + G to launch the Xbox Game Bar.
STEP 2. Click the Widget menu to customize widgets to show up as overlays when recording.
STEP 3. In the Capture widget, turn the Microphone on if needed. Then, go to the Audio widget to scale the microphone sound and the system sound.
STEP 4. Open the game you want to record, and get into the mood.
STEP 5. Click the Record from now icon to start recording the full screen. When done, click it again to stop recording and the game clip will be saved in MP4 to the default folder.

How to Record Gameplay on Windows 10 with FonePaw Screen Recorder
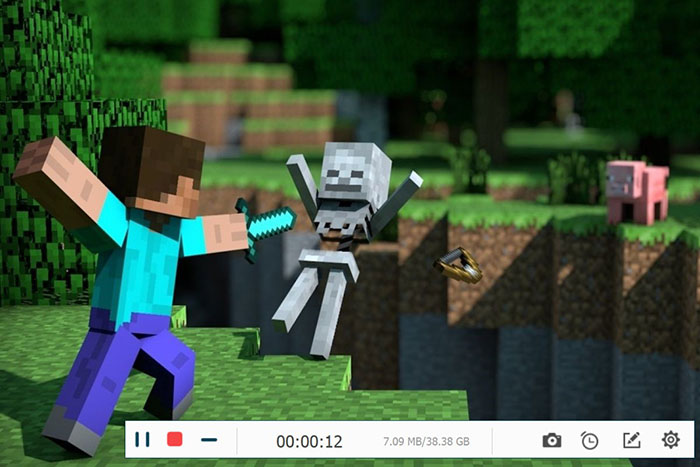
Record gameplay with a powerful screen recorder would be also a good choice. FonePaw Screen Recorder is an all-in-one recorder, which also includes a Game Recorder mode to record all PC games on Windows computer. It can lock the gaming window to avoid any unexpected disturbance. Also, you can record your webcam along the way to interact with other players.
Moreover, it encodes the recordings with advanced codecs to ensure up to lossless video quality at 60fps. When the recording ends, you can cut, split, add, merge, duplicate, compress, or convert the recording with its versatile tools. To grasp more ideas about this excellent recorder, let's check out why it stands out.
Outstanding Features of FonePaw Screen Recorder
- One-Stop Recorder - It offers 8 record modes including Game Recorder, Video Recorder, Audio Recorder, Webcam Recorder, Window Recorder, iOS Recorder, Android Recorder, and Last Recorder which support record all kinds of scenario.
- High-Quality Output - It can export the recordings to MP4, WMV, MOV, F4V, WebM, and MPEG-TS of up to lossless quality from 5fps to 60fps. Or, record the audio in MP3, AAC, M4A, FLAC, WAV, WAV, and others of lossless sound quality
- Real-Time Annotation - It provides a real-time editing toolbar to add shapes, lines, texts, images, and step icons along with a magnifier and keystroke effects that make your recording like a pro.
- Extra Video Editing Tools - It includes a range of video editing tools like Advanced Trimmer, Recording Compressor, Video Merger, and Video Converter to lead you from the start to the end.
- Any Scenario Supported - It works for all scenarios: catch every gaming moment, make a professional video tutorial, record online meetings, save streaming movies/TV shows, and so on.
With a clean and direct user interface, it takes no sweat to record gameplay on Windows 10. Now, you may want to check out how it works as follows.
STEP 1. Download and Install the Program
First off, you need to download FonePaw Screen Recorder to your Windows and follow the onscreen instructions to finish the setup. Then, launch the program from your desktop.
Free Download Buy with 20% off Free Download Buy with 20% off

STEP 2. Launch Game Recorder
Now, choose Game Recorder on the main interface, and enable the webcam if necessary. Also, you should turn on the System Sound and Microphone and do a sound check before recording. To do more presets, you can go to the Dropdown menu - Preferences to modify video settings, directory settings, hotkeys, and so on.

STEP 3. Start Recording Your Gaming Moments
When you've got everything prepared, open the game you want to record and click Select the game to set it fixed. Then, nothing will distract you when you're diving into the gaming world. Finally, click the REC button to start recording. When completed, click it again to stop recording. After that, you can edit the recording as you wish before saving it to local storage.

How to Record Gameplay on Windows 10 with Bandicam Screen Recorder
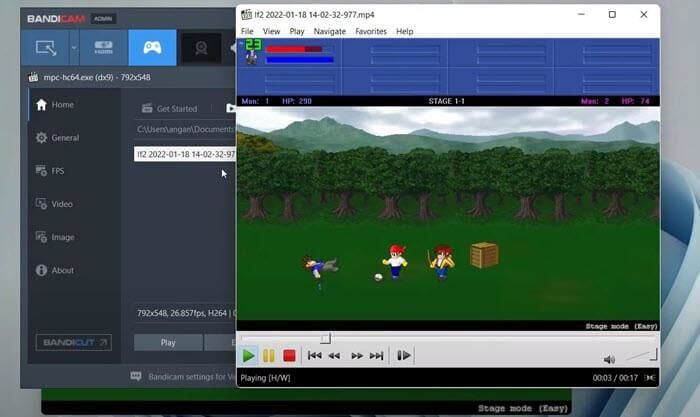
Bandicam Screen Recorder is a powerful screen recorder for Windows only and it's available for a free trial to record a 10-minute video with a logo watermark. Also, it works to meet any recording needs, such as recording gameplay, online lectures, streaming music, and so on. While recording gameplay, you also can add a webcam overlay or real-time drawing to make a clear demonstration. However, it doesn't provide any editing function afterward. If you're unfamiliar with it, let's see how to record your gameplay on Windows 10 with this tool.
STEP 1. Download and install Bandicam Screen Recorder on your Windows 10 computer.
STEP 2. Launch it and select Game Recording from the Home interface and allow this app to make changes to your device if prompted.
STEP 3. Then, open the game and press F12 to start recording. If you want to stop, press F12 again to end the process. You can find the recordings in the Video tab.

FAQs about Recording Gameplay on Windows 10
You may have some lingering questions in mind, but no worries. You can check out the answers to these frequently asked questions before recording gameplay on Windows 10.
How to Record Webcam when Recording Gameplay on Windows 10?
Actually, not all screen recorders can record the gameplay while recording the webcam. Xbox Game Bar cannot add a webcam overlay when you're recording the game. Luckily, this is just an easy mission to complete using FonePaw Screen Recorder. Now, you may want to know how to record a webcam when recording gameplay on Windows.
STEP 1. Open FonePaw Screen Recorder and select Game Recorder to proceed.
STEP 2. To add a webcam overlay, toggle on the Webcam option. Now, click the ∨ icon and choose Settings.
STEP 3. You can modify the resolution, shape, or opacity of the webcam overlay. To have better quality, you can enable camera denoise. After determining the position, click OK to save the changes.
STEP 4. Now, start your gaming adventure and record it with your webcam.

What is FPS and What Does It Mean for Recording Games?
FPS is short for frames per second, which often refers to a series of single images to form a video in a second. The standard for most video content is 24 FPS, but it also varies from region to region. 25 FPS is the standard in UK & Europe while 30 FPS in the US & elsewhere.
Normally, a higher frame rate is good for fast-moving video and making the video more clear and smooth. While you're recording PC games on Windows 10, you may want to set the FPS to a higher rate if you're playing something like a driving game.
Conclusion
To sum up, Xbox Game Bar is a nice starter if you don't want to download any software and are okay without a webcam overlay. Bandicam Screen Recorder enables you to select the gaming window to record, but it cannot edit the recordings if you need. Moreover, it by default adds its logo to your recordings. Meanwhile, both of them are unable to edit the recordings for post-processing.
What is the best way to record gameplay on PC? As far as I'm concerned, FonePaw Screen Recorder outperforms for its powerful and professional functionality. If you not only want to add a webcam overlay but also edit your gameplay recordings, it meets all your needs. Better yet, you can add real-time annotation during the recording.


